
Azure HPC Recipe Document for Siemens NX
1 Introduction
This document will briefly explain the performance test methodology carried out for Siemens NX application on a Virtual Machine deployed in Azure Cloud Platform.
This recipe document covers the following topics:-
- Deploy & connect a required virtual machine for running Application to be tested on Azure platform.
- Install required NVIDIA drivers in virtual machine.
- Install Application on virtual machine.
- Install license manager for current application
- Performance results of current application on azure virtual machine
- Azure consumption
- Summary
2 Deploy Virtual Machine on Azure Cloud Platform
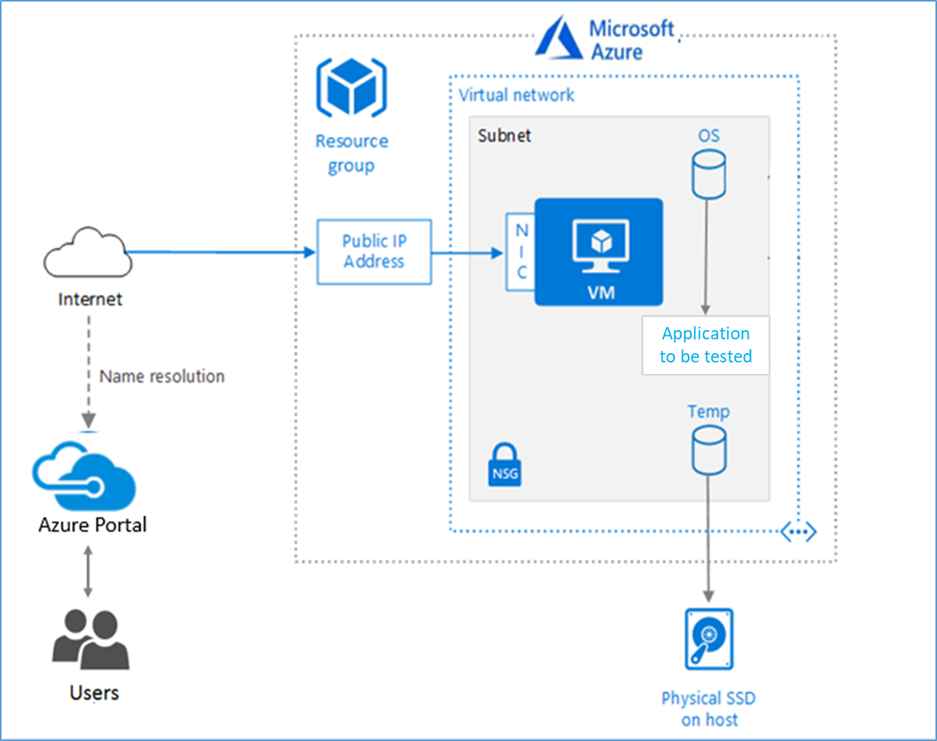
2.1 Azure Cloud architecture for application
The below Architecture explains the virtual machine running on an Azure Platform
2.2 Azure Virtual Machine (VM)
A VM is a virtualized instance of a computer that can perform almost all of the same functions as a computer, including running applications and operating systems.
An Azure VM gives you the flexibility of virtualization without having to buy and maintain the physical hardware that runs it. However, you still need to maintain the VM by performing tasks, such as configuring, patching, and installing the software that runs on it.
Things to be considered before deploying a VM,
- The names of your application resources
- The location where the resources are stored
- The size of the VM
- The operating system that the VM runs
- The configuration of the VM after it starts
- The related resources that the VM needs
There are different sizes and options available for the Azure virtual machines you can use to run your apps and workloads. Depending on the workload user has to choose the appropriate VM size for complete list check this https://docs.microsoft.com/en-us/azure/virtual-machines/sizes/.
To test the performance of Siemens NX on Azure Platform, NV24s_v3 & NV12s_v3 & NC16as_T4_v3 Virtual machine is deployed to analyse the hardware performance..
|
VM Name |
vCPU |
Memory (GiB) |
SSD (GiB) |
GPU |
GPU Memory (GiB) |
Max Data Disk |
|
Standard_NV12s_v3 (1GPU-VM) |
12 |
112 |
320 |
1 |
8 |
12 |
|
Standard_NV24s_v3 (2GPU-VM) |
24 |
224 |
640 |
2 |
16 |
24 |
|
Standard_NC16as_T4_v3 (1GPU-VM) |
16 |
110 |
360 |
1 |
16 |
32 |
2.3 Create a Virtual Machine on Azure Platform
Sign in to Azure
Sign into the Azure portal by using https://portal.azure.com/
Free Trial subscriptions aren't eligible for limit or quota increases.
After the successful sign in or sign up, one has to upgrade the Azure subscription to Pay-As-You-Go to deploy a Virtual machine. For deployment, the user must have regional vCPU quota which can be obtained by raising a request.
The step-by-step procedure to increase the vCPU quota is given below,
https://docs.microsoft.com/en-us/azure/azure-portal/supportability/per-vm-quota-requests
- Type virtual machines in the marketplace search.
- Under Services, select Virtual machines.
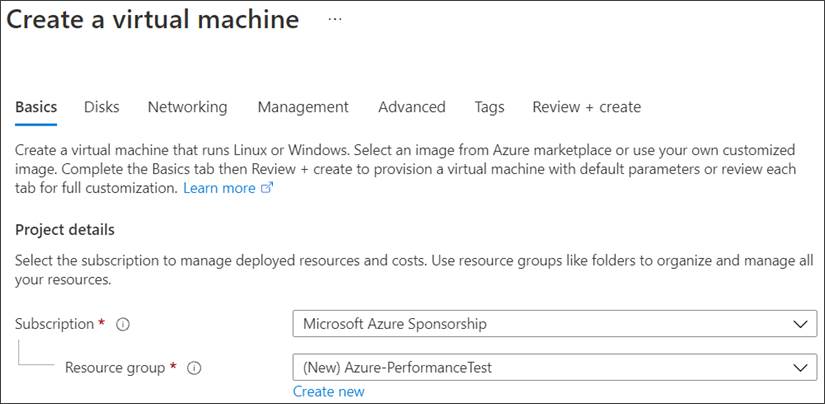
- In the Virtual machines page, select Create Then Virtual machine.
- In the Basics tab, under Project details, make sure the correct subscription is selected and then choose to Create new resource group. Type Azure-PerformanceTest(user choice) for the name.
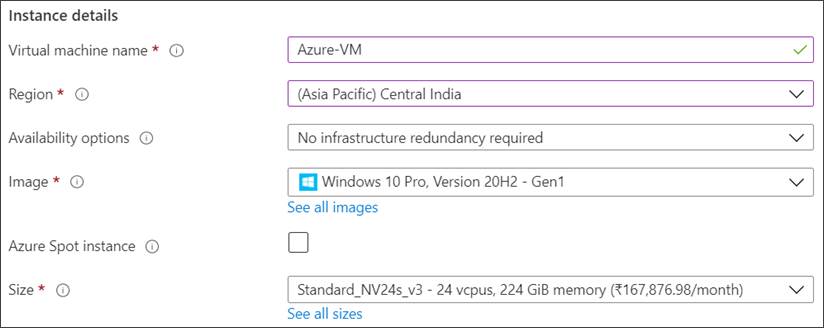
- Under Instance details, type Azure-VM (user choice) for the Virtual machine name and choose Central India for your Region. Choose Windows 10 pro, Version 20H2-Gen2 for the Image and Standard_NV24s_v3 for the Size (user choice). Leave the other defaults.
Note:
- Region must be decided based on where you are going to deploy a Virtual machine. To avoid the network latency, the region should be near to the location where the VM is to be deployed.
- Image selection is of user choice based on the application user can choose the image (Windows 10, Linux based OS and Windows Server)
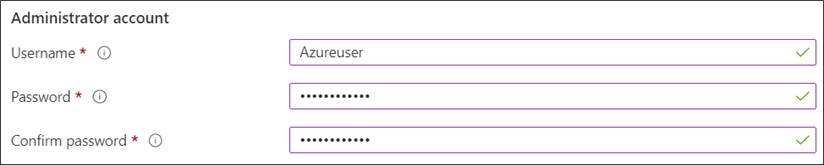
- Under Administrator account, provide a username, such as Azureuser and a password. The password must be at least 12 characters long and meet the defined complexity requirements.
- Under Inbound port rules, choose Allow selected ports and then select RDP (3389) and HTTP (80) from the drop-down.

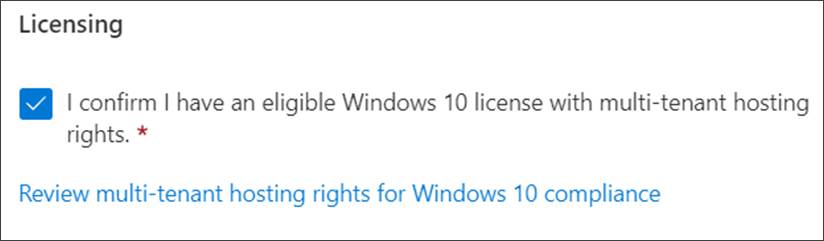
- Under the Licencing click the check box
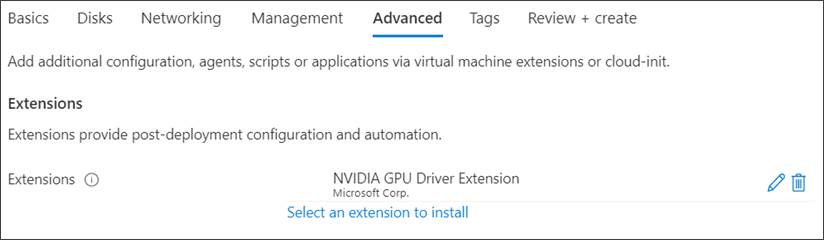
- In Advanced tab, under the Extensions click Select an extension to install, select NVIDIA GPU Driver Extension (user choice)
- Leave the remaining defaults and then select the Review + create button at the bottom of the page.
- After validation runs, select the Create button at the bottom of the page.

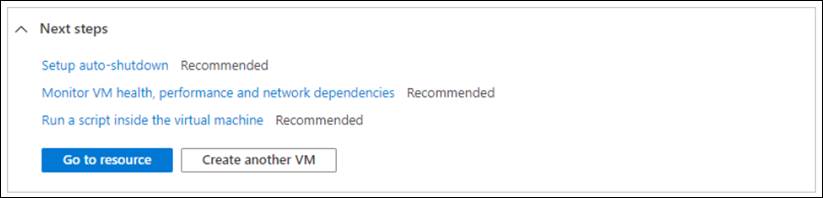
- After deployment is complete, select Go to resource.
2.4 Connect to virtual machine
Create a remote desktop connection to the virtual machine. These directions tell you how to connect to your VM from a Windows computer. On a Mac, you need an RDP client such as this Remote Desktop Client from the Mac App Store.
- On the overview page for your virtual machine, select the Connect button then select RDP.
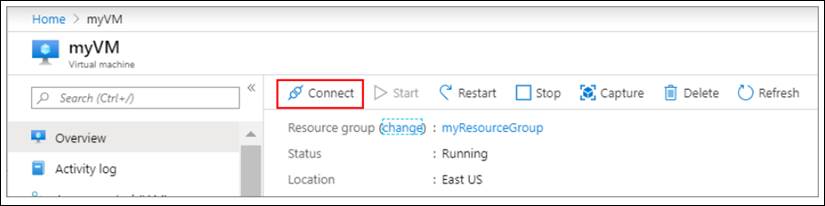
- In the Connect with RDP page, keep the default options to connect by IP address, over port 3389, and click Download RDP file.
- Open the downloaded RDP file and click Connect when prompted.
- In the Windows Security window, select More choices and then Use a different account. Type the username as localhost\username, enter the password you created for the virtual machine, and then click OK.
- You may receive a certificate warning during the sign-in process. Click Yes or Continue to create the connection.
2.5 Install Nvidia Drivers
To take advantage of the GPU capabilities of Azure N-series VMs backed by NVIDIA GPUs, you must install NVIDIA GPU drivers.
In two ways you can install the drivers,
- TheNVIDIA GPU Driver Extensioninstalls appropriate NVIDIA CUDA or GRID drivers on an N-series VM. Install or manage the extension using the Azure portal (Ref 9)
- Install NVIDIA GPU drivers manually. (For the manual installation procedure follow https://docs.microsoft.com/en-us/azure/virtual-machines/windows/n-series-driver-setup/)
3 Install Siemens NX Application on Virtual Machine
Before beginning, open Siemens Support centre in a web browser and log on.
3.1 Licence server Installation
- Prior to beginning the SPLM Licensing installation, you must have a license file.
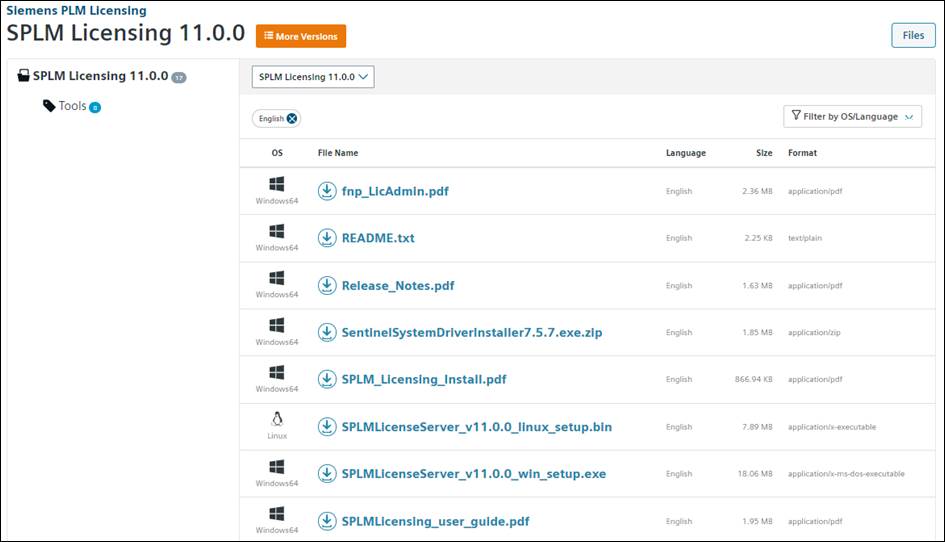
- Download setup & Install SPLM License Server (required in server machine)
File Name: SPLMLicenseServer_v11.0.0_win_setup.exe
Download Link: https://support.sw.siemens.com/en-US/product/286073425/download/PL20191210095924816/
- Launch the setup
- Follow the prompt
- Locate license file path in server
- For more information, refer SPLM_Licensing_Install.pdf
Prerequisite: - The Java Runtime Environment (64-bit) for NX is a system prerequisite that must be downloaded and installed from the Java website: https://www.java.com prior to running NX
3.2 Install NX application procedure
- For downloading NX software, you need web key access account.
- Here in our case we have downloaded NX1980 version
- Download NX Setup from Siemens support center.
File Name: SiemensNX-1980_wntx64.zip
Download Link: https://support.sw.siemens.com/en-US/product/209349590/download/PL20210518370298522/

- Detail installation document is available in downloaded folder
- Run the setup on virtual machine.
- Follow the process.
- Finish the Installation.
4 Performance results of NX on azure virtual machine
- Siemens NX is CAD application.
- Tests are performed with both ATS (automated test suites) and Cert (certification suites) provided by Siemens.
- Installation and use of test suites will be available in test suite folder or provided by Siemens separately.
4.1 ATS for NX
- Download ATS zip folder from Siemens support center by web key access
File Name: ATS_rev4.7.7z
- Extract the zip folder in document directory in virtual machine

- Launch NX
- Bring up Customer Defaults Dialog
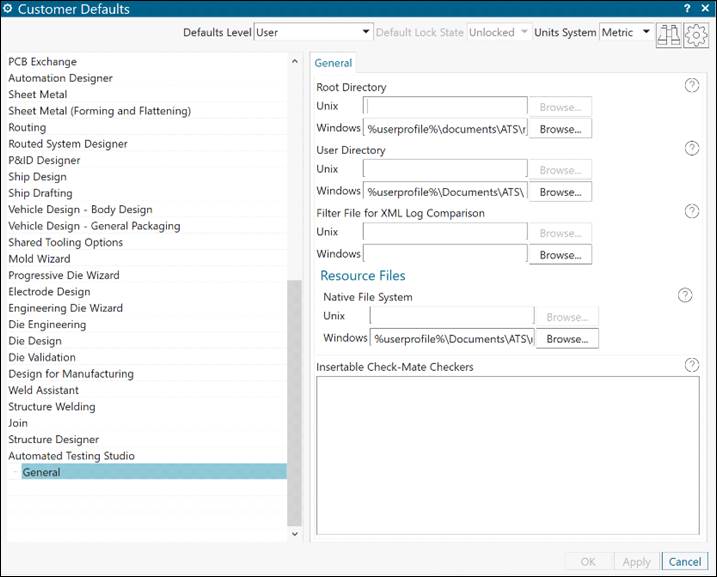
- Select General Node under Automated Testing Studio
- Enter the following value to the entry fields:
- Root Directory: %userprofile%\documents\ATS\root
- User Directory: %userprofile%\documents\ATS
- Resource file: %userprofile%\documents\ATS\resource\
- Maximize NX
- Create a new part
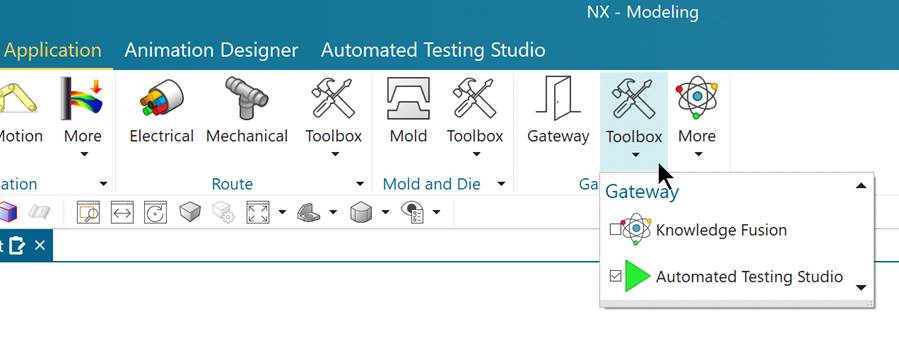
- Toggle on Automated Testing Studio. (Under Application tab Gateway Toolbox Dropdown)
- Exit NX.
- On next launch of NX, you will be ready to run ATS test cases
4.2 Cert Package for NX
- Download certification package from Siemens GTAC by using the web access key
- Open the access center. Navigate to download-NXCP
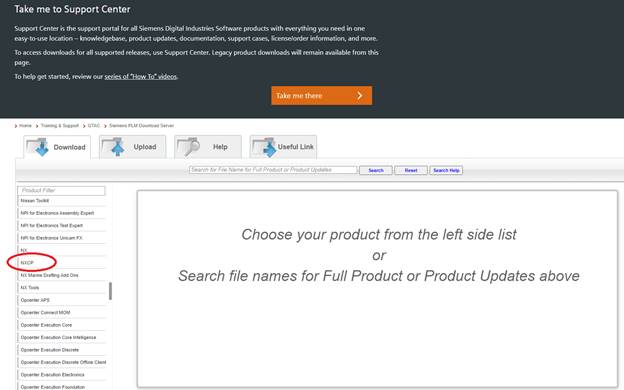
- Click Product Updates and Customers
- Type exact file name in prompt window and download the file.
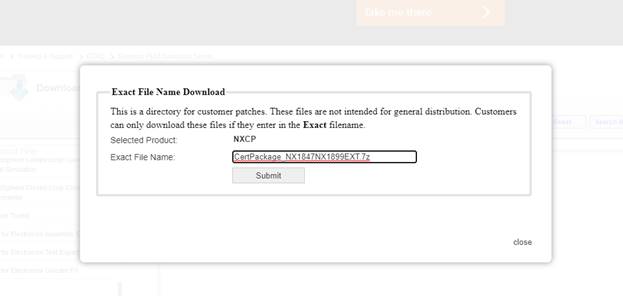
- Extract zip folder at appropriate location by entering password (provided by siemens).
- Download this file: https://www.dropbox.com/s/n7ioerjdshsalvu/NXCP_13.exe?dl=0
- Go to where the cert package was extracted
- Then go down to CertTests\NXCP
- Copy NXCP_13.exe there and run that instead of nxcp.exe when you start testing.
Note: This file requires some Visual Studio C++ redistributable to be installed. However, if you have already installed NX you should not have to do that.
5 Siemens NX 1980 performance results
5.1 Cert Package results
Certification test cases performed by using NXCP tool (Siemen’s tool). To demonstrate varied capabilities, test cases are grouped, and each test group consists of multiple number of tests cases.
The following table shows the test cases status on both 1-GPU VM and 2-GPU VM configurations.
|
Test Group Name |
No. of test Case |
1 GPU VM |
2 GPU VM |
1 GPU (NCas_T4 16 CPU) VM |
|
GDAT_LEGACY |
15 |
Pass |
Pass |
Pass |
|
TCVIS 2007 |
10 |
Pass |
Pass |
Pass |
|
TECNOMATIX_OpenGL Display |
2 |
Pass |
Pass |
Pass |
|
TECNOMATIX_OpenGL Buffer |
2 |
Pass |
Pass |
Pass |
|
NX1847_Manual |
7 |
Pass |
Pass |
Pass |
|
NX1899_Manual |
7 |
Pass |
Pass |
Pass |
|
NX 1899 Mark |
6 |
Pass |
Pass |
Pass |
5.2 ATS (Automatic Test Suite) results
ATS test suits are run on two different virtual machine such as NVv3 and NC16as_T4_v3 machine.
|
Case No. |
Description |
Case ID |
1 GPU VM |
2 GPU VM |
1 GPU (16vCPU NCas_T4) VM |
|
AT-01 |
This test listing window shows data correctly. |
Listing Window |
1 Min 11 Sec |
31 Sec |
18 Sec |
|
AT-02 |
This test verified correct display of mirror display in different view types. |
Mirror Display |
1 Min 40 Sec |
1 Min 8 Sec |
1 Min 10 Sec |
|
AT-03 |
This test case verify de-emphasis displays. |
Deemphasis |
1 Min 13 Sec |
1 Min |
57 Sec |
|
AT-04 |
This test case verify Grid displays. |
Grid Display |
1 Min 47 Sec |
1 Min 16 Sec |
51 Sec |
|
AT-05 |
This test verified correct display of raster image in different view ports. |
Raster Image |
20 Sec |
19 Sec |
23 Sec |
|
AT-06 |
This test show multiple views in one window. |
Multiple Views |
23 Sec |
26 Sec |
25 Sec |
|
AT-07 |
This test check background setting while in wireframe display. |
Background Setting Wireframe |
45 Sec |
29 Sec |
34 Sec |
|
AT-08 |
This test verifies correct display of light and shadow in advance studio |
Light Direction |
21 Sec |
20 Sec |
23 Sec |
|
AT-09 |
This test case verify Display Section. |
Display Section |
4 Min 35 Sec |
2 Min 8 Sec |
1 Min 52 Sec |
|
AT-10 |
This test case verify Display modes. |
Display Modes |
17 Min |
45 Sec |
43 Sec |
|
AT-11 |
This Test Case activates HD3D and representation status with tags. |
HD3D |
1 Min 37 Sec |
47 Sec |
47 Sec |
|
AT-12 |
This Test Case activates Face Analysis and verifies displays with reflection |
Face Analysis |
52 Min |
41 Min |
40 Min 33 Sec |
|
AT-13 |
This test will rotate views in sync |
Synchronize View |
18 Sec |
16 Sec |
15 Sec |
6 Azure Cost
Note: For azure cost calculation, we have neglected the time to Installation NX on the Virtual Machine and only considered the total time taken to run the Automatic test suites. The Hourly rates reported are subject to change. For the current rate please refer the link “https://azure.microsoft.com/en-in/pricing/calculator/”
|
VM Name |
# GPUs on VM |
Azure VM hourly cost ($) |
Wall clock time |
Total Azure cost |
|
NV12s_v3 |
1 |
$2.14 |
1 hrs 23 min 10 sec |
$2.97 |
|
NV24s_v3 |
2 |
$4.29 |
50 min 25 sec |
$3.60 |
|
NC16as_T4_v3 |
1 |
$2.30 |
49 min 18 sec |
$1.89 |
7 Summary
- NX Application is successfully deployed and tested on NV_v3 & NCas_T4 series Azure Virtual Machines.
- All test cases (both ATS and Cert) are successfully run on 1GPU VM (Standard_NV12s_v3), 2GPU VM (Standard_NV24s_v3) and 1GPU VM (Standard_NC16as_T4_v3) configurations.
2 Deploy Virtual Machine on Azure Cloud Platform
2.1 Azure Cloud architecture for application
2.2 Azure Virtual Machine (VM)
2.3 Create a Virtual Machine on Azure Platform
2.4 Connect to virtual machine
3 Install Siemens NX Application on Virtual Machine
3.1 Licence server Installation
3.2 Install NX application procedure
4 Performance results of NX on azure virtual machine
5 Siemens NX 1980 performance results